Category: Crafts
Author Name: Samantha Vargo
Posted: 02-09-2016 02:37 PM
Views: 8662
Synopsis:
Can you take an old busted wooden picnic table and make it beautiful again? We did!
Browsing my facebook wall one day I saw that someone in my community was moving and had an old wooden picnic table available for free. It needed some "serious love" and "a bunch of muscles." I have those! I hastily made my desires known, and swooped up that table (with some definite groaning from the muscle department).
Immediately I realized the photos didn't quite show the table's condition as much as I would have liked- but you can't beat free! A few replacement screws, bolts, and a board and we were back in business! Once we had it fully assembled I checked out the green mold it and warped wood- could this really be something I could make beautiful?
Break out the pressure washer! The belt sander! The paint! I would make this work. I had a vision in my head....
After pressure washing the table, I could now see the wood grain, I love wood grain! Next, I got my electric sander and went to work on the top, benches, and edges. Whew! Looking at this fresh, soft table... I didn't want to fully cover it with paint! I used some stain from my basement, but didn't have enough for the whole table- I alternated boards on the top with my two stains, and did the benches with the one that had more. We live in Ohio, so even though the table was beautiful, it is an outdoor table and needs protection... and a thick paint will do that (and I had already bought it in the clearance at Lowes)... but could I make the wood show through? Even just a bit?
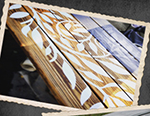
Trading Phrases to the rescue! I bought a wall runner (leaves) from them HERE and applied it to the top of the table. Now, the decal wasn't a super fan of sticking to my still very porous and not-so-smooth table, but I got it down after a bit of determination. Wow! I loved the look of the white on the wood grain and didn't want to cover it even more at this point. I vowed that the next time this table needed a make over I would sand it, do a reverse decal as a stencil and paint it white in this same pattern over the wood. However, as I'd already started down this path I wanted to just finish it.
I started slapping on the paint. Wow, this was some THIRSTY wood. It drank up my paint like you wouldn't believe- and after three coats I was finally satisfied with the coverage. I started to peel up the decal to reveal the wood beneath. LOVE! At this point I had one board done and I really liked the look of just the one board with the pop of wood. Should I leave it this way? This is why I should never start projects- I second guess myself the whole way through! I peeled up the rest and revealed the beautiful table below. Later, I sealed it with poly to keep it fresh longer, as snow is imminent.
What do you think? Should I have done the white on wood grain, one single strip of grain pattern, or exactly how I did it?
What do you think?
|
 |
|
|
|
|
About the Author
|
Samantha Vargo
|
Samantha is a lady of many talents. When not playing with fun fonts and designs at Trading Phrases she enjoys the outdoors immensely- with her husband, their 6 year old daughter, 1 year old son, & 7 year old Siberian Husky go on many adventures hiking, kayaking and exploring what they can in Ohio. She also loves pizza.
|
|


