Excellent message and design. Easy to install.
Dec 29, 2020

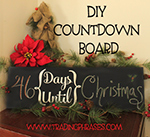
This super simple DIY project is both stunning and versatile!
|
As the holidays draw near and the snow is falling, my 3 year old daughter keeps saying "It's Christmas now, Mommy!" She can't conceptualize that just because there is snow on the ground and carols playing in the store, it doesn't mean that it is Christmas. It breaks my heart to see her crestfallen face every day when I have to explain that it's still coming.
There are many things to count down to throughout the year and I've seen so many countdown objects out there. I don't want something that has snowmen on it or is really tailored to one event. I want to be able to change it out and have it be universally used for all of our count down events- everything from holidays to sleepovers. Drawing inspiration from several boards on Pinterest (check them out below), I finally came up with the perfect idea for our family- a chalkboard countdown board!
Check it out! I love it because it is versatile, decor friendly, and super simple to make and use! Want to make your own? I've created an easy DIY guide below.
What you Need:
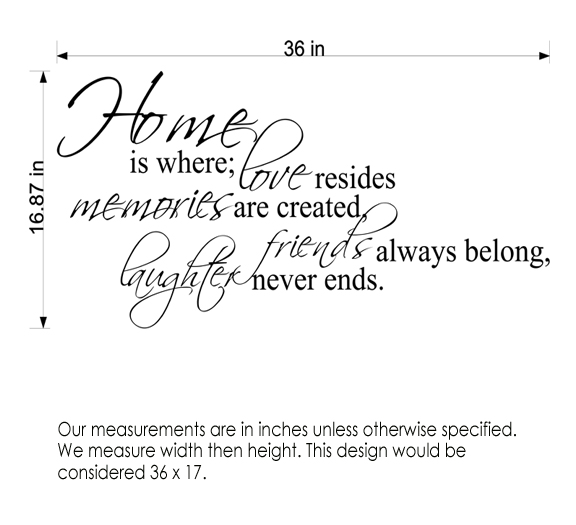
Wood Board: I used a pine board I found at Lowe's. I thought that it looked perfect! It's 2ft long, just over 7" tall, and less than 1" thick. You can use whatever size works best for you. Chalkboard Paint: I used the paint-on kind, but they also have the spray stuff. You can also make your own! Read THIS. Decal: It's found HERE on Trading Phrases. I used size 8" wide and 6.5" tall in White (10) Pick whatever fits your board the best.
To create it:
1. Sand the board (if needed- mine didn't) and paint a few coats of chalkboard paint on until it looks even. 2. Once it is completely dry, apply the decal following the instructions that trading Phrases provides. I applied my decal more on the left of the board than the right since I wanted more room to write what we were counting down to than the numbers themselves. I found that the decal really wasn't a fan of sticking to the chalkboard paint, so you may need to use a little elbow grease or wait a little longer after it dries that I did! Once I applied it, I used a hair dryer to warm it up and smooth it firmly to my board to make sure that it was well-stuck. 3. Write your days and event with chalk or a chalkboard marker!
Having this around has been so much fun! My daughter loves to help me write the new numbers every day, and she can now conceptualize when Christmas is. Not only this, but I'm using the board as an educational device for teaching her how to write numbers and counting backwards! I can't believe I didn't make this sooner! It would have been so wonderful while her daddy was deployed! About the Author
|