|
Hi Trading Phrases fans! Have we got a fun craft for you!
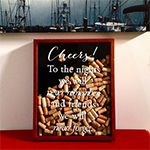
So one night we were sitting around drinking wine, when someone noticed that we have a LOT of wine corks. We don't tend to throw them out at our house unless they're ripped into pieces, since they make a really good craft item. We didn't want to throw them away, but we really had more than we knew what to do with. Some corks we didn't want to make crafts with. Some corks were sentimental, some were from bottles we drank in Italy or Australia, and some just had cool designs on them. But what to do with so many wine corks? We were stumped until we found a cute shadowbox frame at our local Hobby Lobby and got super inspired! Here's what we made out of them...
So how do you make it? First, here's what you need to gather up:
-
A shadowbox frame with glass. We found ours at Hobby Lobby, but Jo Ann's and Michael's also has them, as well as most other craft stores. Just look in the shadowbox section!
-
(Optional) Background material, cut to fit the back of your shadowbox, to be seen behind your corks/seashells/other material. We didn't use any, but scraps of gift wrap, fabric, or scrap booking paper would look great. Remember to grab craft glue if you're putting background material in!
-
The material you want to display in each shadowbox. We used old wine corks, but you could use seashells, feathers, sand, beads, Christmas ornaments, small bells, dried leaves, dried flowers, confetti, etc.
-
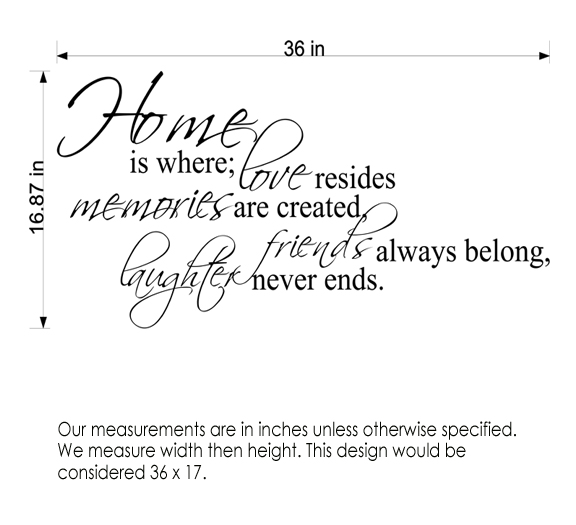
Vinyl lettering from Trading Phrases! We used this design since we were using wine corks and it looked cute. You could use any vinyl design, though. A monogram would be cute for a wedding-themed shadowbox. You could use a Christmas quote for a holiday-themed shadowbox. It's up to you! Be creative!
-
(Optional) Painting supplies if you want to paint your frame before you fill it. We didn't, though, and it came out so cute!
Follow these easy steps to put it together:
-
Gather your supplies.Take your shadowbox out of the packaging and wipe down the glass surface with some glass cleaner. Make sure it's totally dry before continuing with your next step.
-
(Optional) Paint your frame first, if you're going to. Wait until it's totally dry!
-
(Optional) If you're putting a background pattern in, cut your material to fit the back and slide it in. If you want to, you can glue it in with craft glue so that it's super stuck in there. If you use glue, though, wait for it to dry before continuing!
-
Apply your decal to the glass front. Peel off the backing paper and line it up exactly where you want it on your glass front. Put it on and rub the decal all over to press the lettering onto the glass really well. Remove the application tape.
-
Place your box upside down and fill with your filler material to your desired level. Remember, you don't need to fill it up all the way! You might want some of the background to peek through.
-
Close your shadowbox and you're done!
|