Adorable D-I-Y Stocking/Stockings Hanger

Author Name: Samantha Vargo
Posted: 12-04-2013 05:24 PM
Views: 31016
Synopsis:
Perfect for those of you without a fireplace to hang your stockings on- this stocking hanger is not only CRAZY easy to make but also really fun to get the kids involved with!
|
I moved to a new city this year, and with it- had to downsize to a smaller home. Now we live in a cooler place, but it makes it tough with the holidays- we have less room for a tree and no place at all to hang stockings! Since we are renting I am nervous about putting holes in the walls to hang stockings on- not that I couldn't, but I just don't want to. There has to be another way!
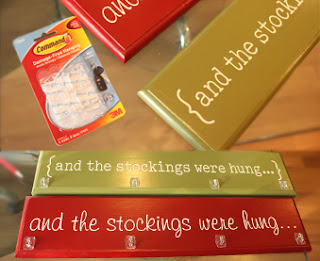
Searching around I found adorable decals from Trading Phrases- "And the stockings were hung," the sentiment was perfect, and they have three styles to choose from (1 & 2, 3)! Unfortunately while this would beautifully accent the walls above where my stockings were indeed hung, I still have no place to actually hang them. Connundrum. I searched JoAnnes and saw that they have the little command strips with hooks- I could have the hooks up and remove them with no damage to my walls- yay! I bought them immediately. I got my decal, I got my hooks, and then I got an even better idea... making a wood plaque with the hooks on it I could bring out every year! This way I wouldn't have to toss that beautiful decal at the end of the year or re-buy these hooks- and I could always have a nice stocking hanger when the time comes.
It turned out SO beautifully I cannot wait to share it with you so you can do your own!
What you will need-
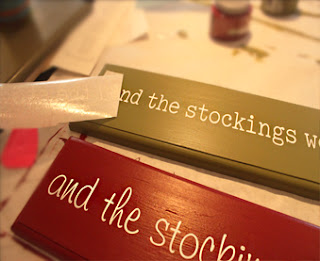
How to Create Yours- 1. Get your board ready- I did a light sanding coat on the top of mine so that the paint would adhere more easily. Paint a few coats to completely cover it- don't forget the edges!
2. Once dry apply your decal- I chose a white one so it would pop. Installation is easy, simply follow the directions they provide and use the little handy installation tool. Something I'd do differently- I meticulously centered my decal, now that the stockings and hooks are hanging at the bottom I wish I would've placed the words slightly higher- up to you.
3. *Optional step* Seal the decal on the board with paint or spray Polyurethane. The photos below show using both- I found that the spray was easier to use, but the paint on was a thicker/more protective coating. 4. Apply your hooks and trim off the overhanging "pull tab" that gives them easy release.
5. To Hang- I originally used picture hanging alligator clips, but then decided I really didn't want holes in my walls, so I pulled those out and just used large Command Strips once again (I seriously love these babies). What do you think? Do you love it? I gave one to my friend, and this is how hers turned out, too. Adorable! About the Author
|


