Excellent message and design. Easy to install.
Dec 29, 2020

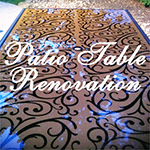
If you have an old, weathered patio table this easy DIY project is for you! Kelly, a fabulous facebook fan walks you through how she re-did her scuffed-up table and made it beautiful again with our swirls wall runners!
|
Trading Phrases is always coming up with fun, new ways to use our decals... and we get SO excited when YOU share your projects with us. Kelly, a long time customer and facebook fan came up with this amazing renovation of her old, weathered patio table. We were so thrilled about it that we asked her to blog about how she did it! We love how it turned out and Kelly is such a hoot! -Samantha Have you ever been shopping for something for the house and have come across an item that you just HAD to have? I mean to the point where you don't even consider the practicality of the style? I did that with our patio table set. We needed a set, so it wasn't a frivolous impulse buy. We were shopping specifically for a patio set. But once I set my eyes on the gorgeous shiny amber glass, I was hooked. I didn't consider that in order to keep it shiny, it has to be cleaned. Very well. A LOT. I mean it's outside all the time, for Pete's sake! I didn't consider that because the glass was removable, that dirt and water would creep to the underside of the glass. So that meant double cleaning. Double very well. Double a LOT. And I didn't consider that because it is glass, that it would get scratched and etched with wear and tear. I just saw the shiny, pretty table and fell in love... Fast forward to about seven years later. At least. Scratches, dirt, and etchings by weathered beatings galore. My shiny pretty table is still shiny, but obviously worn. What do I do now short of buying a new patio set? Which I couldn't do - we were talking about putting our house on the market so there was no room in the budget for that. Think....think...THINK... The other side isn't etched and scratched. Just flip it over. Yeah, but that doesn't solve my problem with the dirt and water going on the underside. Ok....caulk it. Yeah, but that doesn't solve my problem with hiding the scratches and etches - glass is clear, remember?? Even amber glass. Ok....I want it to not be clear any more...but I want it to be pretty... And there, borne out of what I considered to be great need (I'm sure my husband thought I was goofy), I came up with the idea to use Trading Phrases decals to make my table pretty again. I had already purchased a few of their decals and I (like every other sane person) am IN LOVE with about 98% of what they have. So I measured my patio table and sat online looking at all of my options. I bookmarked the designs I thought could work. I emailed Samantha incessantly about measurements and could they do this with that, and make this that size.......(gosh, that girl is PATIENT!!) and thanks to Samantha's lovely soul, I decided my best bet was to use the wall runners. I needed a gap in the table to allow for the umbrella hole, and getting one pattern to fit the entire table the exact right way without having to cut too much out of the center was nearly impossible to find. I chose the Swirl Wall Runner (WP901) in outdoor black. My table is a black-ish powder coat and I wanted something that would be clearly seen through the glass, and also very sturdy to endure the weather. I purchased the wall runners, they arrived and I was SOO excited to start my project! But by the time I had decided on what to use, we had already put our house on the market. I had a two and half year old little boy and a household that needed to be perfect all the time. And needed to be ready to leave the house empty at nearly the drop of a hat so I couldn't start a project like this. We sold our house but our new house wouldn't be available just yet. So we had to rent a townhouse in between, and my beloved wall runners went into storage, and then it was winter...and I had to wait even LONGER! Thank goodness Trading Phrases makes a high quality product! It was rolled up in it's package for a YEAR by the time I could use it!! I have talked about it so much, I just pray it looks as good in real life as it does in my head! Finally this year, after we got ourselves moved and settled (and after rescuing two German Shepherd puppies). I found a nice day with several nice days to follow, got my son down to nap, the puppies tuckered out and in their crates, and set to it. Without much further ado... My now gross table. Partially cleaned, but still yucky. Can't see all the scratches and etches in it unless you are close up. Probably a good thing.
I cleaned it as best I could, and this is where I realized that I couldn't get it all off. Which made me upset, but then I thought "Hey - it's over seven years old. It will still look better than it does now." I got out the decals and unrolled them and measured. And measured. And taped. Then adjusted. And measured. Adjusted. Adjusted. Taped. Measured. Taped. Adjusted. Like 73 times. I wanted to be sure I was doing this so that it was straight, even, didn't have a huge gap in the middle and had even spaces all around the edge. Because even though you probably won't notice it, I am a little bit anal (ok, a LOT anal!!) and *I* will notice it so the chance that you will notice it will make me crazy. I then quickly figured out that trying to do an entire length was going to be nearly impossible. So I cut in between the pattern, knowing I could match up the cuts each time, making sure my pattern stayed the same and didn't have any weird gaps. Let me tell you - glass is SERIOUSLY unforgiving!
Once I found my groove, it became easier and quicker to stick the decals to the table. Not without issues, mind you, because the decals had been rolled up for a long time, which caused some of the paper to gap. And did I mention glass is seriously unforgiving??!!!? Once you get it stuck, it's not going anywhere unless you're going to rip it apart or stretch the daylights out of it. Little bits of etching or even some dust as the wind blew caused issues. And I should have had my husband help me take the entire table down to the basement, but that would have been a huge ordeal, so I just pressed on. At the ends, I wrapped the decal completely around the table and cut it on the other side so it wouldn't get peeled off. Once I got an entire row down, I couldn't wait to see how it looked. So I started peeling (Make sure you press very firmly, on every single piece, or it will get ruined. These decals are a year old, so just do yours within 60 days and you shouldn't have a problem) and I began to get more and more excited as I could see it unfold. Finally, I had the entire table covered in decals and I loved it! Half way there!!
My husband helped me move the table to the yard - I figured if I got paint on the grass, it would be getting cut anyway so it didn't matter. I made sure the table was covered and only the glass would get paint. I sprayed white paint lightly all over the table, allowing it to dry and did a bunch of layers. I truly didn't want the table to be see-through any more. Then I sprayed on clear lacquer in a few layers to really seal everything in. I considered removing the decals afterward, but knew that one would still see through the table if I didn't that. Uh uh. Not obsessing about the dirt underneath showing any more.
I allowed it to dry thoroughly, and hoped my neighbors weren't mad at me for making it smell outside with all the paint I was spraying. It did smell. A BUNCH. My husband helped me take out the glass and set it down flat. I used a thick all weather silicon caulking on the inside lip of the table and prayed it would work. Not too much oozed out and it was starting to come together. My husband and I flipped the glass over - making the smooth side be the table side again - and placed the glass with the decal and paint facing DOWN. I let it set overnight in the caulking then bought black outdoor silicone caulking to fill in the gap between the glass and the edge of the table. I could finally take the ugly, green clips that held the glass in place and toss them altogether. I painted the plastic guard for the umbrella pole black and put it back in. It had been an ugly, dingy, yellowed hunk of plastic and is now black and shiny. And here it is! Our finished patio table. I love how it turned out, and it seems to be holding up really well. Everyone who sees it thinks it looks pretty great as well.
Take the time to think about the possibilities. Let your mind wander about the options of changing something old into something "new" and beautiful. Trading Phrases will be more than happy to make your dream a reality! About the Author
|