Cart is empty

- Home
-
Custom Decals
-
Decor Ideas
- Popular & Trending
- Gold Dots Add Glam
- Classroom Decal Ideas
- Chevron Tutorial
- Easy Accent Wall Update
- Baseball Stitches Room Update
- Amazing Staircase Before/After
- Easy Exercise Room Updates
- Decorating a Boy's Room
- Designer Accent Wall
- Decal as a Headboard
- Stairway Makeover
- Put His Word on Your Wall
- Dorms & Decals
- Halloween Top 5 Looks
- Update Mirrored Closet Doors
- Video: Christian Wall Decals
- Video: Nursery Inspiration
- Video: Laundry Decals
- Video: Kids Room Decals
-

- As Seen In
- As Seen On HGTV
- 2012 Parade of Homes Feature
-
- Recent Facebook Posts
-
- Instagram Photos 2016
- Instagram Photos 2015
- Instagram Photos 2013-2014
-
- Top Pinterest Boards
-
- Naturally Inspired
- Video: Trees Decals Slideshow
- Vintage Look: Wedding Prints
- The Cat's Meow
-
- Wedding Inspiration
- Wedding DIY Decals
-
Decal 101
- Creating a Custom Design
- Design Your Own Decal
- Custom Quote Request
- Favorite Fonts
- Decal Colors
- Full Color Printed Decals
- Free Online Design Session
- Request a Design Change
- Measure for an Arch Decal
-
- Videos About Decals
- Video: How to Installing Decals
- Video: We're on TV!
- Video: Install a Giant Decal
- Video: Photo Collage WallPaper
- Video: Decals on Glass/Mirrors
- Video: Customer Videos
- Video: Christian Wall Decals
-
-
Our Blog
-
Gift Ideas
-
Crafts & DIY Projects
-
Trending & Hot
-
Shop by Room
- Kitchen & Dining
- Outspoken Appliances
- Wine & Food
- Designs for Etching Glass
- Video: Kitchen Decals Photos
-
- Laundry & Craft Room
- Video: Laundry Decals
-
- Office, Study, or Den
- Business & Commercial
- Classrooms & Schools
-
- Nursery
- Names & Monogram Decals
- Trees & Branches
- Video: Nursery Decals Inspiration
- Video: Trees Photos Slideshow
-
Decal Collections
- Monograms & Custom
-
Off the Wall
-
Business/Commercial
-
- Coffee Shop & Cafe
-
- Business & Office Signage
-
- Word Walls
- Blog: Word Walls=Big Impact
-
- Education & Classrooms
- Gifts: Thumbprint Thank You
- Blog: Classroom Art Tree
- Blog: Classroom Decal Ideas
- Blog: Decals on Cinderblock
-
- Business Signage
- Fuse Cardinal Health
- Blog: Put Your Walls to Work
-
- Offices & Teams
- Best Seller: Teamwork Decal
- Gyms & Fitness
- Best Seller: Gym Word Wall
-
- Salon & Spa
-
-
Printed / Art

Blogs & News
Videos
DIY Art Display Project
Category: Crafts
Author Name: Samantha Vargo
Posted: 02-25-2014 06:04 PM
Views: 7476
Synopsis:
Author Name: Samantha Vargo
Posted: 02-25-2014 06:04 PM
Views: 7476
Synopsis:
Is your fridge overflowing with your childrens' art? We've created a super simple, super beautiful way to display it- without cluttering your kitchen.
|
When my daughter started pre-school this fall I was thrilled, and even more so when she started learning her letters and doing amazing crafts and paintings- I was thrilled right up until the point that my refrigerator was full and things were falling off every time we opened it. Yikes! She was so excited to bring her projects home and show them off that I didn't want them to have to be put in an old box in the basement a week later, simply because we didn't have room for them. There HAD to be a better solution, right?
I browsed pinterest- because of course, pinterest HAS to have fantastic ideas- it is the craft and mommy mecca! I found some good ideas, but nothing I loved, so I merged a few.
Of course, we moved two months later and I had to install it all over again, but I like it even more in the new home.
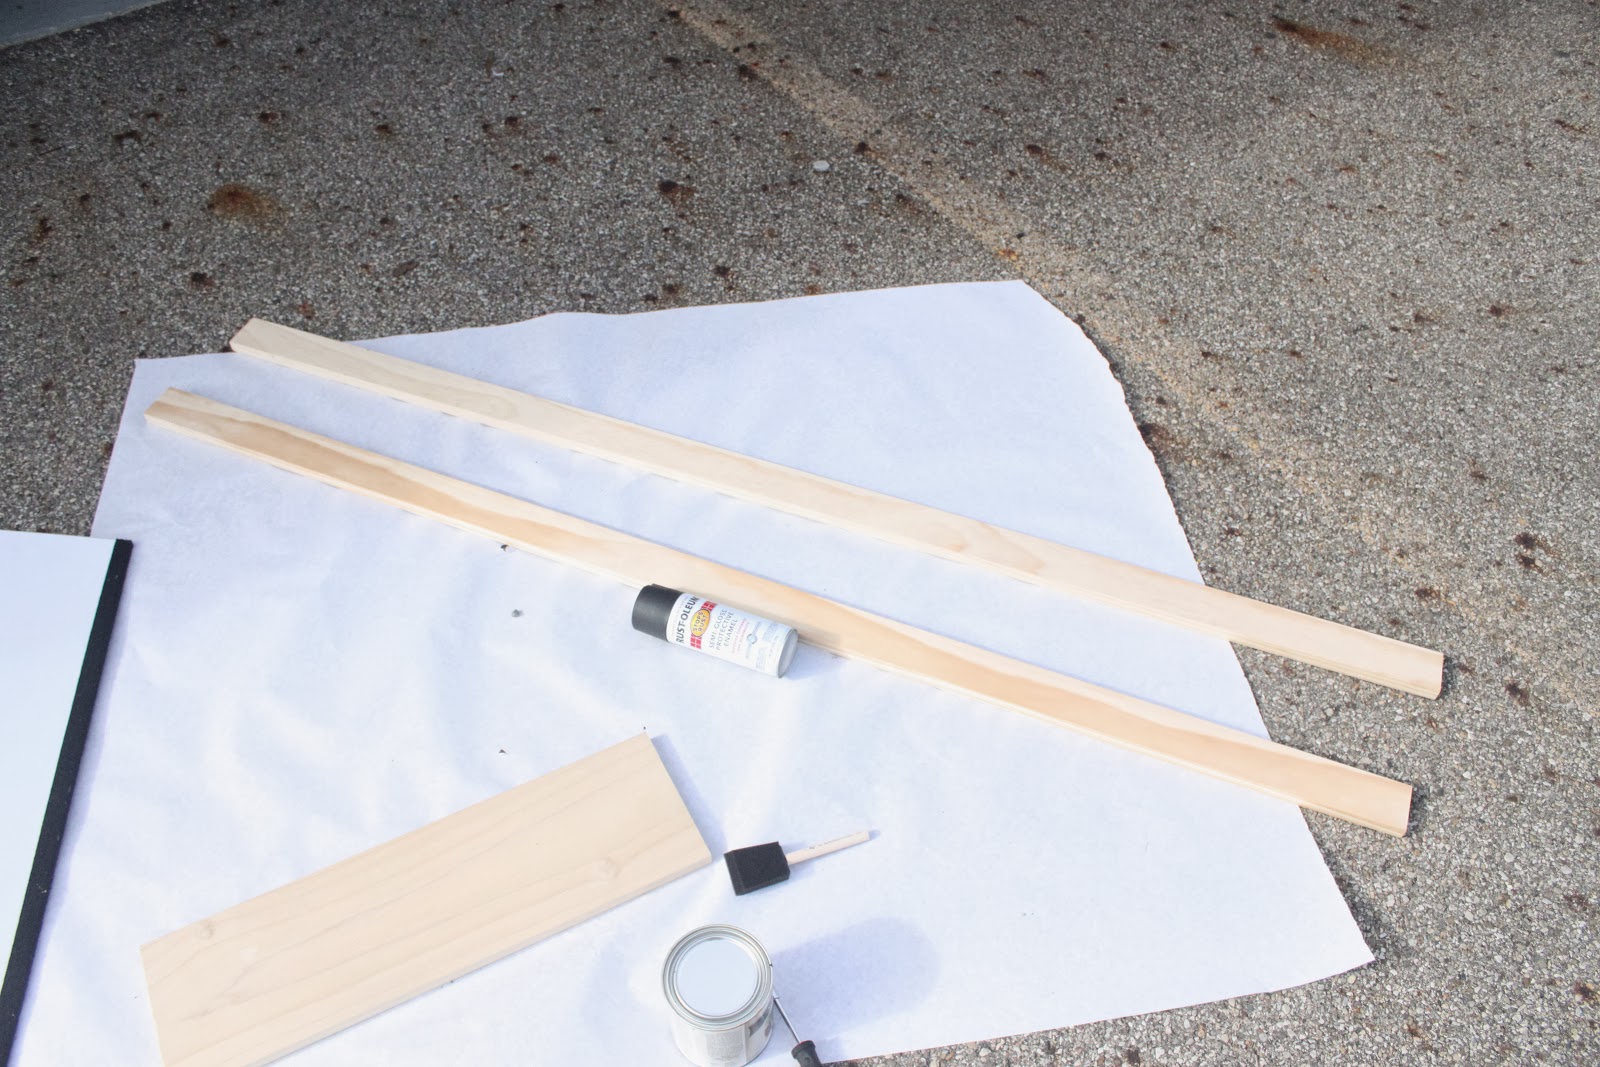
How to DIY Supplies:
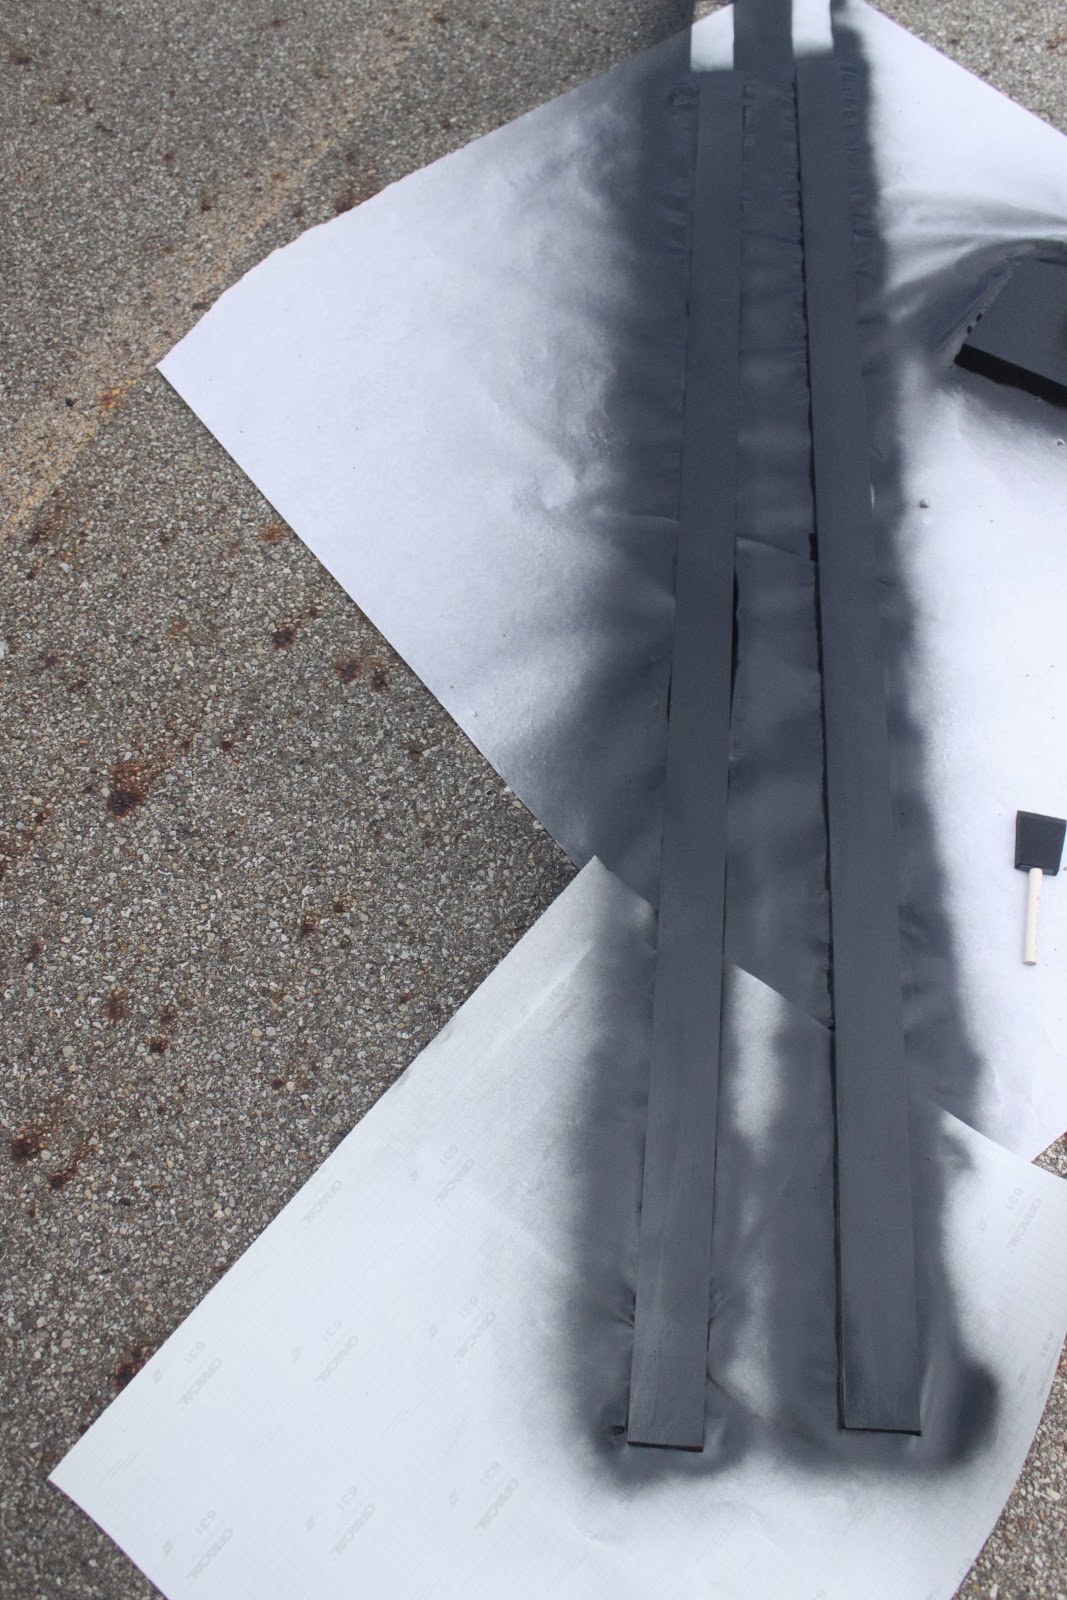
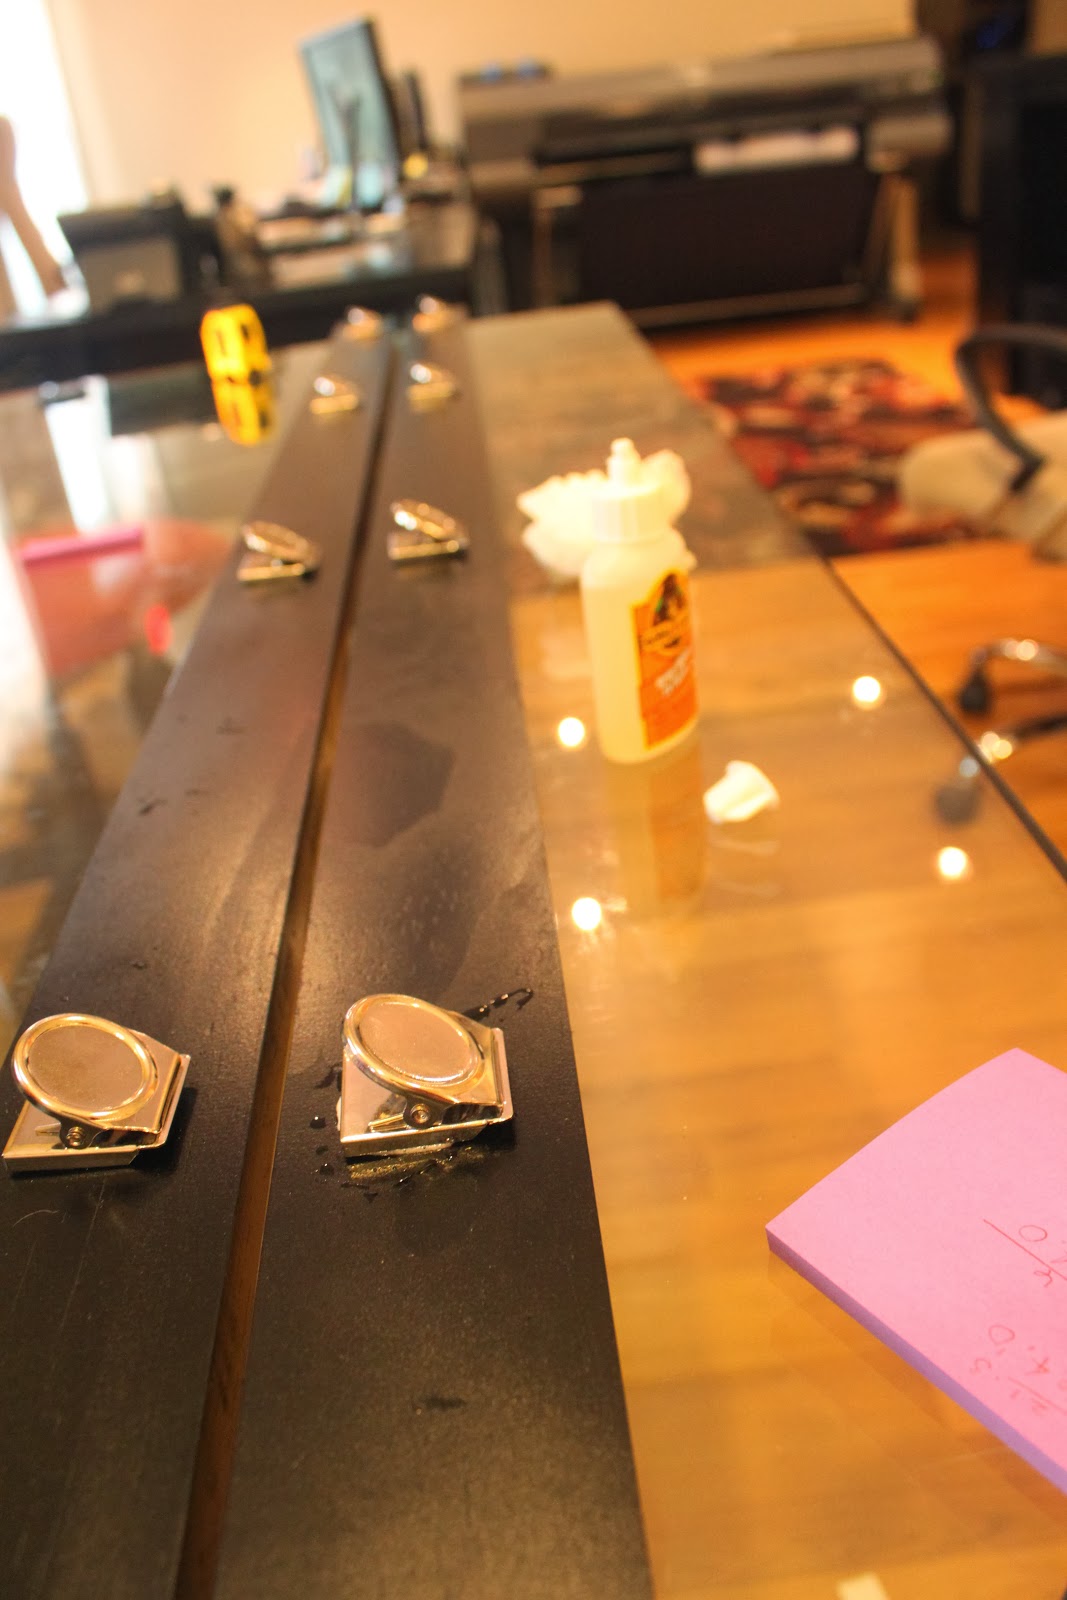
Breakdown: 1. Paint your boards. Be sure to get ALL sides- I even painted the back just in case. If you do it on a windy day like I did it will dry REALLY fast, but it may also get some dirt blown onto it. You know, I guess you've got to take the good with the bad.
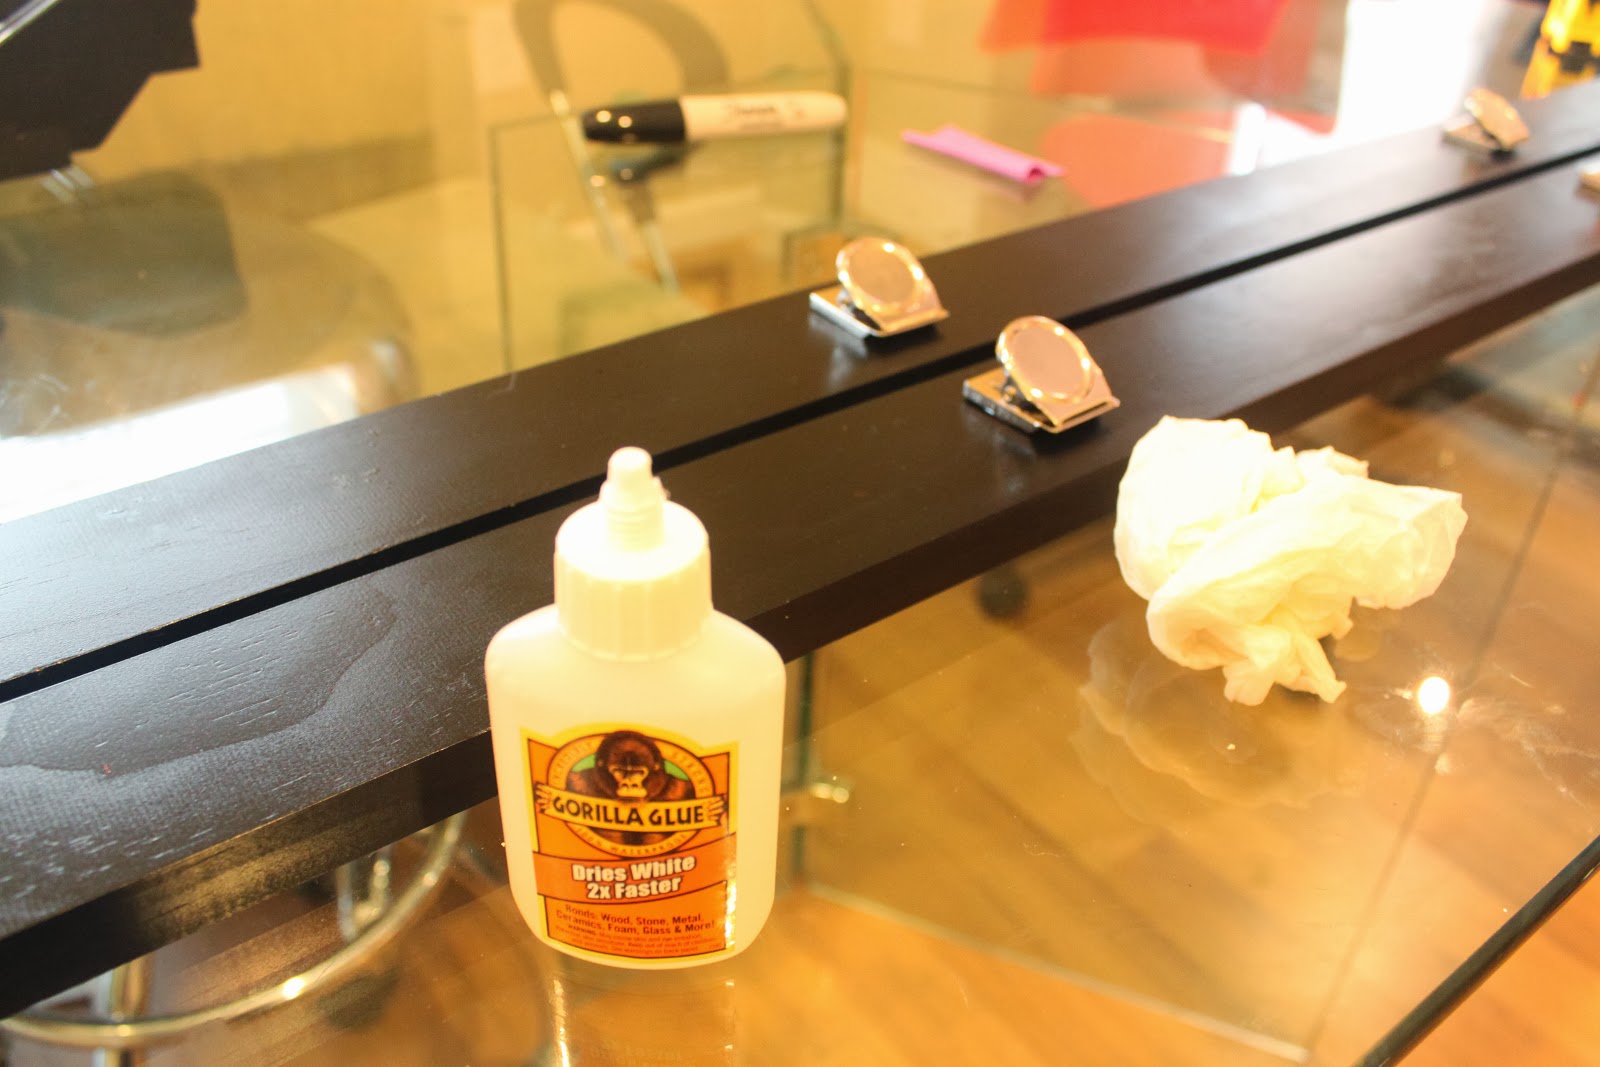
2. When the paint dries line up your metal clips along the board at a distance you like. To determine this I didn't really measure, but pulled out two sheets of paper (what I assume most projects are sized like) and lined them up with a 1" gap between them and put the metal clips at the center of where the papers were on the board. Then I measured between them and spaced the rest out the same way. You could also just measure between them, I used 5 clips on mine- however that works best for you. Once it looked about how I'd like it to I applied some gorilla glue to the back of the metal clips and put them on the board to dry overnight (if using gorilla glue please read the directions thoroughly, I used too much and some that gooped out around the clips- I painted it black, but it still drives me bonkers- learn from my mistakes!) Let it dry overnight. Hint: Line the boards up so you only have to measure once- just copy where they are on the first board and apply the clips to the same place on the second!
3. Your boards are essentially ready to go at this point! I at first applied alligator clips to the back, but upon installing at my first house found that this was a major bother- don't do it! My husband decided to screw them directly into the wall, which works much better. Installation Tips:
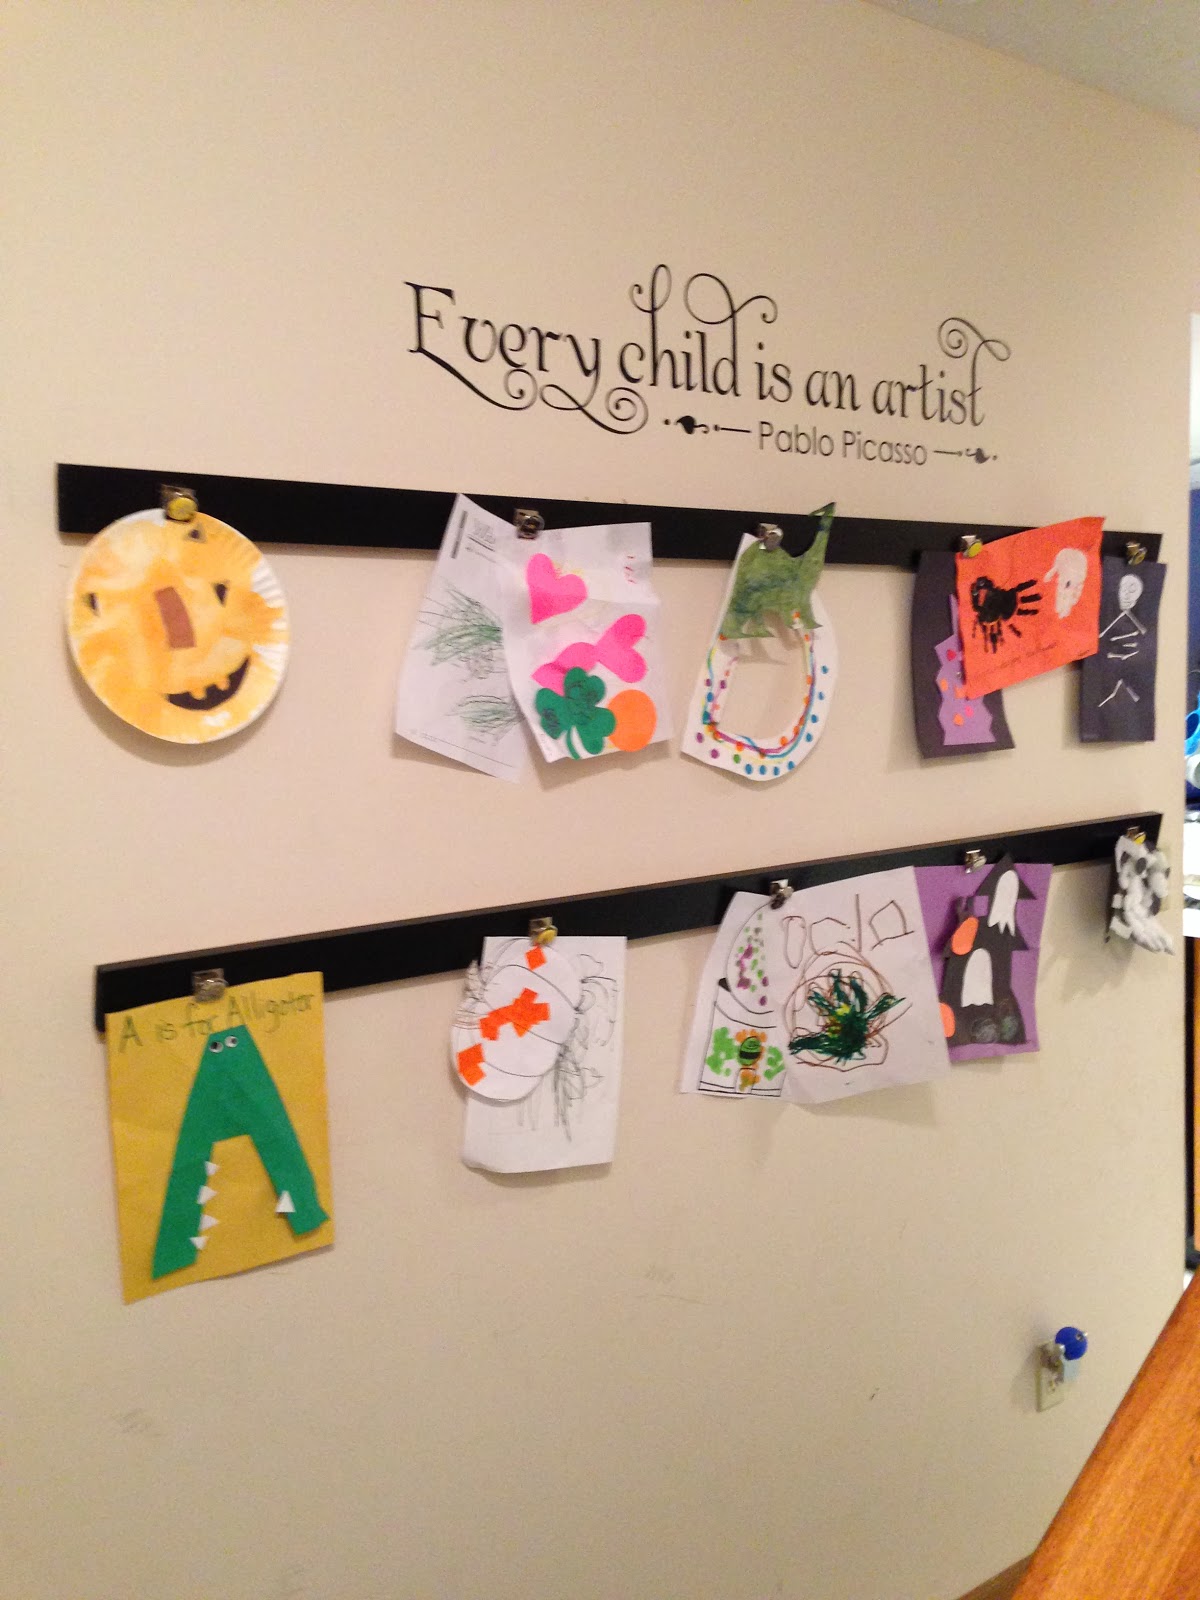
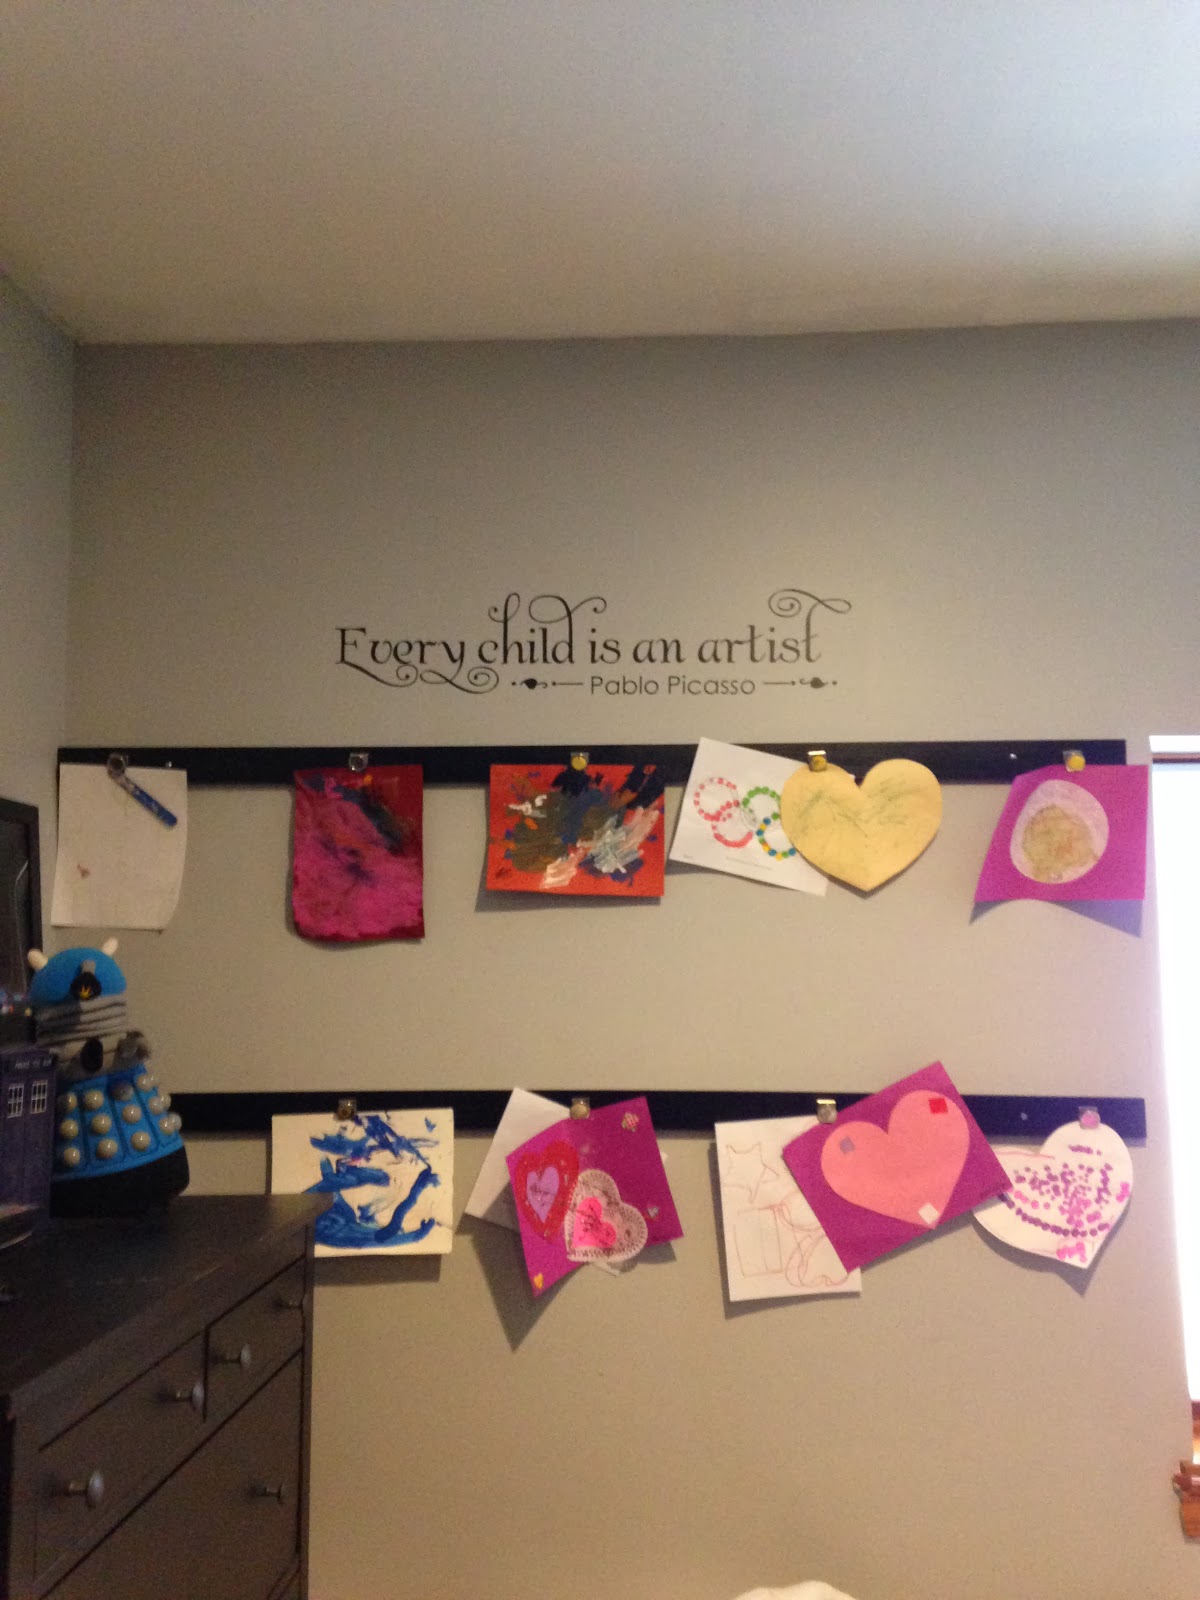
4. Optional fourth step- applying your decal. I really floundered with this, one one hand the boards with her art looked awesome!! I was so excited and she loved to hang them up- we got a lot of compliments from fellow moms and even some kiddos were asking for these displays in their homes, also. The space above them was just so... empty- and I was worried that hanging something there would not only take away from her art, but also really look too cluttered. I played with a few ideas and settled on a subtle decal, the toughest choice was choosing which!
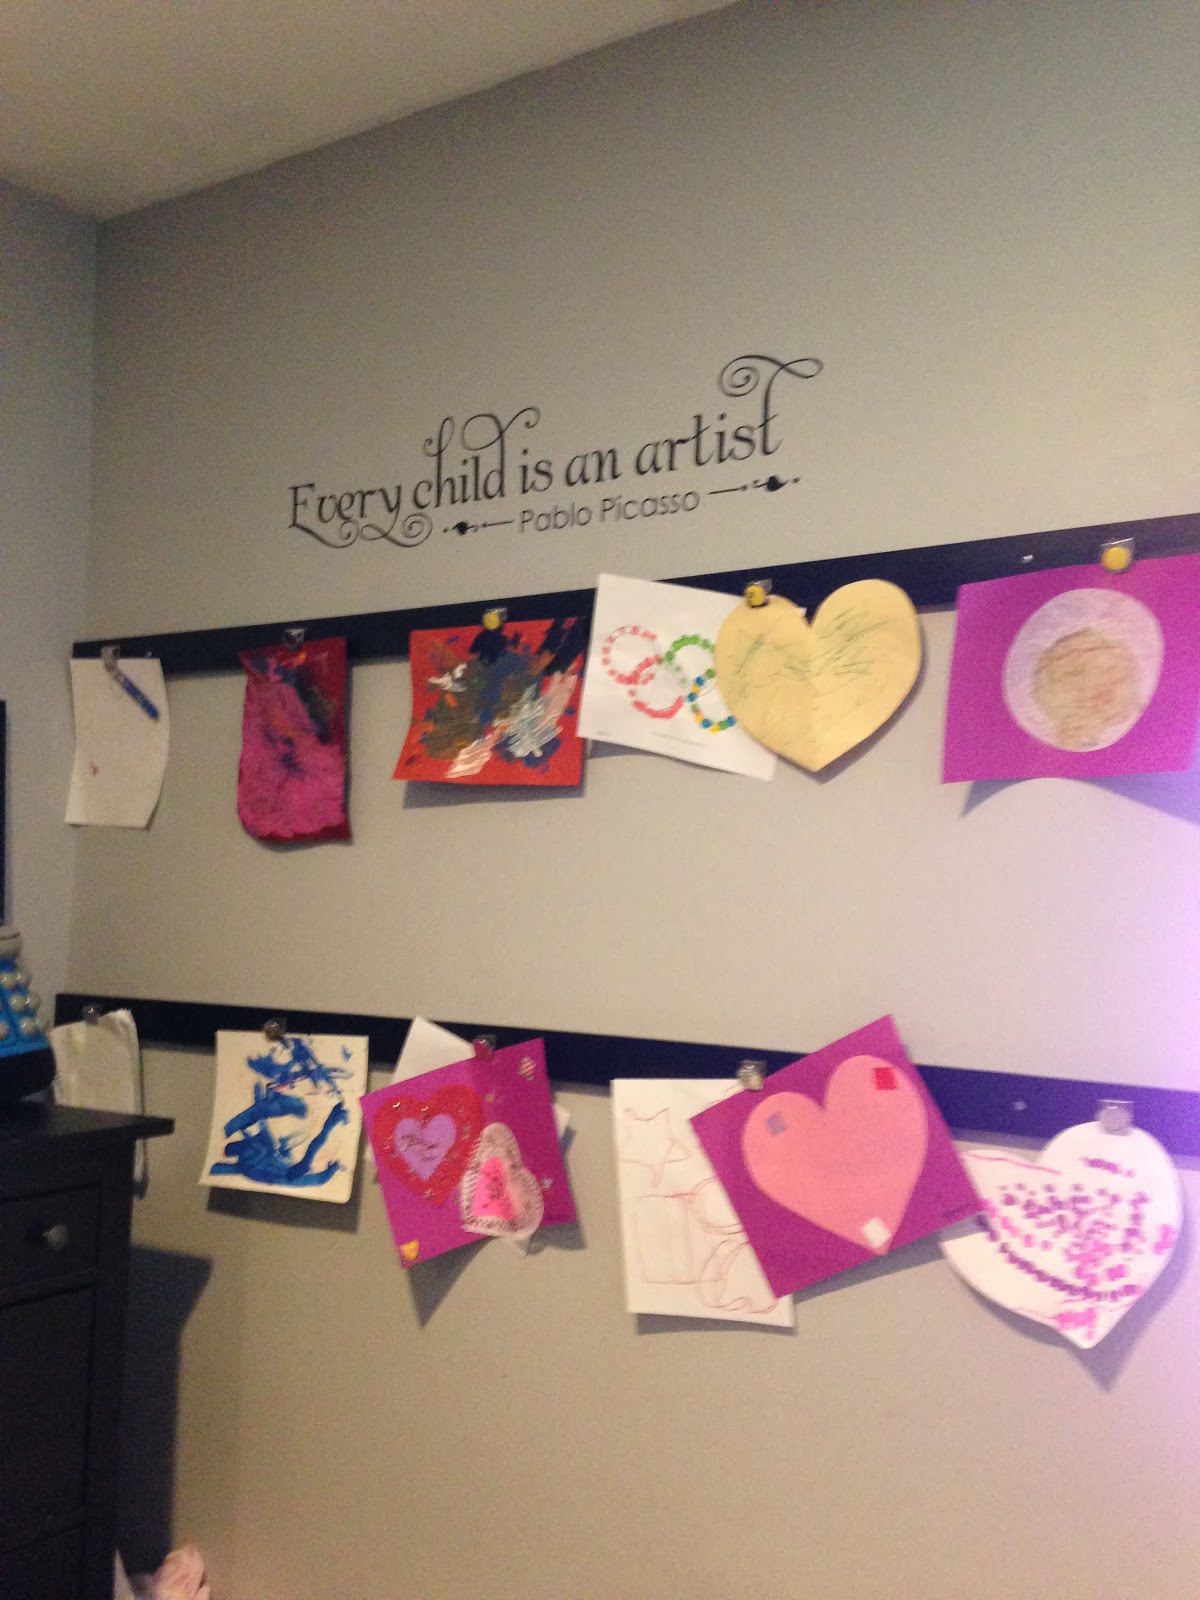
Finally, and with my husband's help, I narrowed it down to two: Every Child Is An Artist and Masterpieces (I also really liked Create funky and Create Simpy Words) and decided on the Picasso quote.
Check it out!
It is so funny that you can tell the months that I took these photos simply from the type of projects she worked on that month (Halloween and Valentines Day). Sure, we still have to put her old projects in a box in the basement, but now they get a lot more visibility for a lot longer!
What do you think, something you'd do?
Sidenote: I also put magnets on the clips sometimes to change up the feel of the board, it isn't really necessary (and they do fall off) but it is a fun touch, especially if this is in an area of your house that a lot of people see.
About the Author
|
.jpg)

Comments on DIY Art Display Project


Copyright © 2008-2024 Trading Phrases
Scroll Down To Load More